Carefully prepared for a long time, I believe you are ready for the next step: Choose a trustful video editor to create the final wedding video.
Once again! Notice that effects matter less than content. The editor which is easy to operate is A BETTER OPTION, not a pro-version one. Then you just need to follow the below steps to get a unique wedding video immediately.
5 Steps to create a wedding video fast
I prefer to use EasyVideoMaker, because it is easy to operate for beginners. For example. Run the software, you’ll see an UI screen as follows:
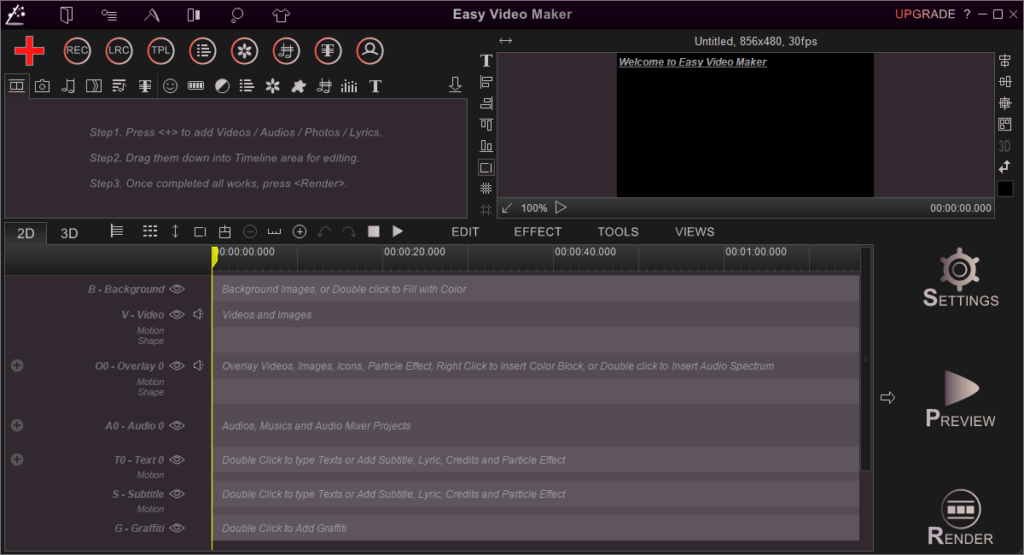
Step 1: Click the big “+” to upload images of you and your lover, your favorite romantic music, dating clips and text for each image. Pay attention to the prescribed format. For instance, the text files must be *.txt. Of course, you can type your text sentence by sentence, and then adjust its style, font, color, motion and so on.
Then you can click these icons to find those you uploaded before separately.

Step 2: Click the “camera” icon, dragging images to the timeline in the “Overlay” part according to their display order. Same to add the background music you selected to the audio part in the timeline.
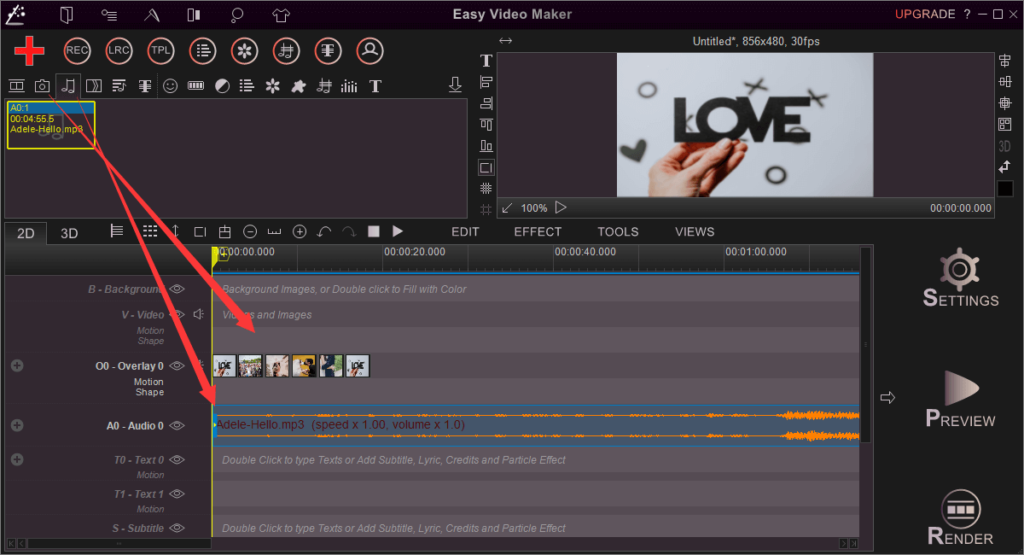
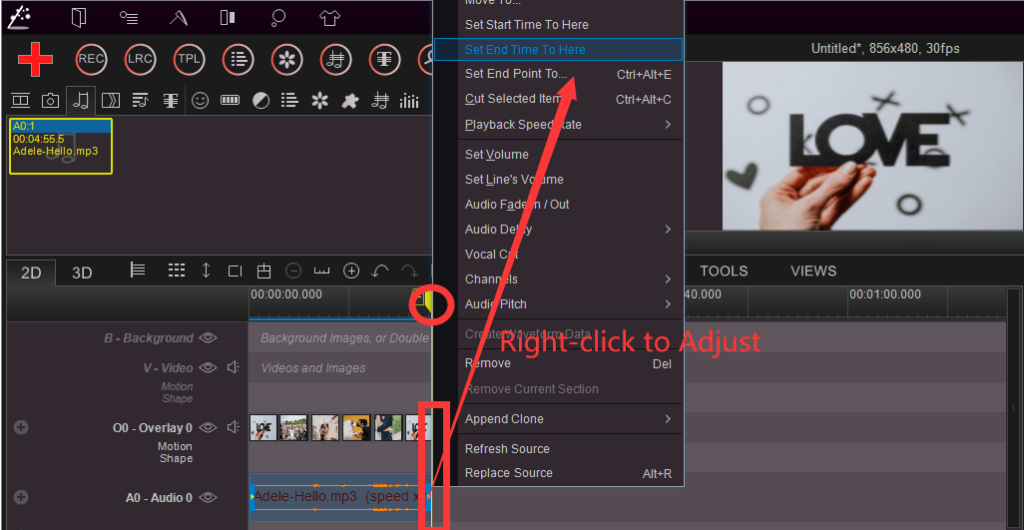
Step 3: Move the yellow time cursor to point at where you want to start or end the music/audio. Then right-click to adjust the start-time or end-time to match with the display-time of the picture. You can also pick a picture and then right-click to add various basic “effects” to smooth your video, such as “Motion Effect”, “Mask Effect”, “Shake with the Audio”, etc.
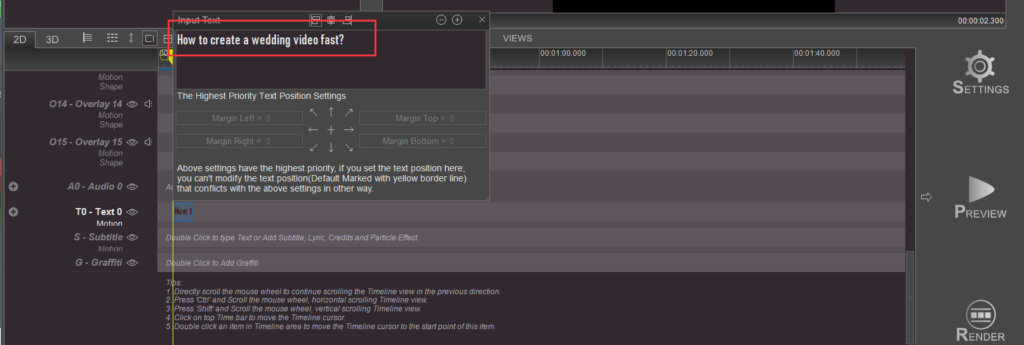
Step 4: Find the “Text” part in the timeline zone, and right-click to insert text, typing the sentences in the empty line. Uploading local subtitle files & text files is also a nice try. Subtitles will not overlap with each other while you drag to move along the timeline. Remember to check the format of your files to make sure it is right for keeping the subtitles work.
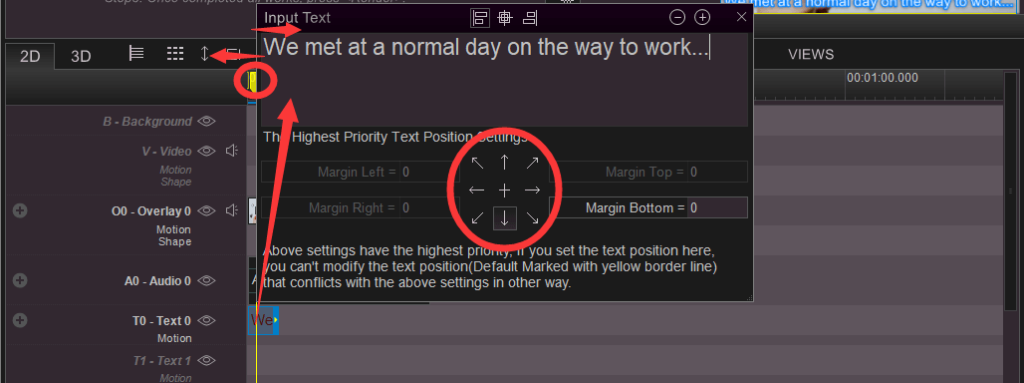
You can right-click to change the font, color or style of the subtitles.
Pay attention to the location setting. If you click one of them, the text location is fixed. But if you don’t do that, you can freely drag the text on the screen to find a proper location.
Step 5: Check the completed video by clicking the “Review” button.

If there is no problem, and you are satisfied with the video you made, you can press the “Render” to save it on the computer with the *mp4 format. Otherwise, you can beautify it by customizing text effect templates, adding particle effects, using 3D group templates, etc.. There are too many deeply hidden functions that will surprise you once you find them.
They are waiting for you to explore. Give it a try right away!
We’re consistently wanting to make content that’s really valuable to you, so go ahead and comment below with any questions that you might have. Such as the issues and hiccups you are facing when actually going about creating video content? If you find it interesting, you would like to share it with your friends. And there are so many ways to better use your cool and unique wedding video.
![How to make a good tutorial video? [video making tips series] How to make a good tutorial video? [video making tips series]](https://www.easymakevideo.com/knowledge/wp-content/uploads/2023/06/how-to-make-a-good-tutorial-video.png)
